What Is Refacing a Kitchen Cabinet?
Written by webtechs

What Is Refacing a Kitchen Cabinet?

What Is Refacing a Kitchen Cabinet?

You don’t necessarily have to tear everything down to the studs when you redesign your kitchen. In fact, cabinet refacing is one of the best and cheapest ways to change the look of a kitchen. For a lot of homeowners, refacing gives their kitchen the look and feel of a brand-new one without the cost, hassle, or long wait times of a full replacement. What does cabinet refacing really mean, and when is it the best option?

What Cabinet Refacing Is

Cabinet refacing is the process of changing the visible outside surfaces of your kitchen cabinets while leaving the cabinet boxes in place. Refacing provides your cabinets a whole new look by upgrading: instead of tearing down and rebuilding the whole thing.

  • Doors
  • Fronts of drawers
  • Hardware and hinges
  • Veneers or laminates on the outside

Refacing is a wise and quick choice for many renovation jobs because it focuses on looks rather than rebuilding the cabinet boxes.

How Cabinet Refacing Works

There are a few important steps that are usually part of a cabinet refacing project:

1. Check and get ready

A remodeling expert checks the cabinet boxes to make sure they are safe. Boxes that are strong and well-made are great candidates for refacing.

2. Taking off the doors and hardware that are already there

We take off and throw away doors, drawer fronts, hinges, and knobs (unless the homeowner asks for them to be reused or kept).

3. Putting on new veneers or finishes

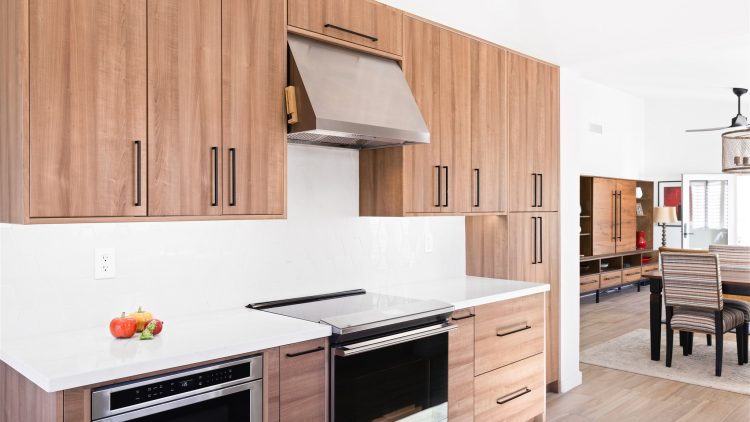
The frames of the cabinets get a fresh surface. Depending on the look they want, homeowners can choose from high-quality wood veneers, laminates, thermofoil, or painted finishes.

4. Putting in new drawer fronts and doors

The homeowner can choose from a variety of styles for the new doors and drawer fronts, such as trendy shaker or classic raised-panel designs.

5. Putting in new hardware

The modernized look is finished off with knobs, pulls, and soft-close hinges that make the door work better.

The end effect is a kitchen that looks like it has just been rebuilt, often in less than a week.

1. It’s cheap for homeowners to reface their cabinets.

Refacing usually costs 30–50% less than replacing all of the cabinets, so it’s a good choice for homeowners on a tight budget.

2. Little disruption

Refacing is a much cleaner and speedier way to rebuild because the cabinet layout stays the same and there isn’t much demolition.

3. Good for the environment

Keeping cabinet boxes that are still in good shape cuts down on waste and stops perfectly good materials from going to landfills.

4. Freedom to design

Refacing may make an old kitchen look brand new by giving it a lot of fresh colors, materials, finishes, and hardware.

Final Thoughts

Cabinet refacing is a great option for homeowners who want to make big changes to their kitchens without spending a lot of money or time on a full overhaul. Refacing is the best way to get the right mix of beauty, value, and efficiency when your cabinet boxes are strong but the outside looks old.

Kitchen Cabinet Refinishing

Kitchen Cabinet Replacement or Refacing – What Is Right For You?

it is always great to have new cabinets, so if you can afford it and it works within your budget plan for your home, new kitchen cabinets will add to the resale value and look great. However, cabinet refacing is a very viable alternative if you do not want to make as large an investment up-front.

MK Remodeling Offers Kitchen Cabinet Replacements And Installation In Mesa

Are you thinking about kitchen cabinet replacements, installation, cabinet hardware or cabinet organizers in Mesa, Arizona? MK Remodeling offers professional and affordable bathroom remodels, and kitchen remodeling services in many areas of the Phoenix, Arizona area.

Tile Installation Costs 2025
Written by webtechs

Tile Installation Costs 2025

What Tile Installation Typically Costs in Phoenix (2025 Edition)

In Phoenix, for a mid-grade ceramic tile (material + labor), a common benchmark is about $6.94 per square foot. ProMatcher
For the state as a whole, ProMatcher reports about $7.17 per sq ft (range $6.30–$8.03) including material + labor for a “middle of the road” tile job. ProMatcher

If you step up to premium materials (porcelain, natural stone, large formats, mosaics) or tougher layouts, national guides suggest costs from $10 to $50 (or more) per sq ft installed. HomeGuide+2HomeGuide+2

Also, local tile pros sometimes quote installation rates (not including tile) between $10 and $40 per sq ft — so if your tile is premium, your total might lean toward the upper side. Thumbtack

Another local source, Bare Floors in Arizona, estimates that ceramic tile installation (all in) might run $6.50 to $10.20 per sq ft, with porcelain bumping up to $9.70 to $18.40 per sq ft. Bare Floors

What Raises or Lowers Your Price

Here are the big levers you can pull:

  • Tile quality & type: Basic ceramic is your budget hero. Porcelain, stone, glass, or decorative mosaics add cost.

  • Tile size & pattern: Large format tiles, diagonal layouts, or complex patterns require more cuts, time, and skill.

  • Subfloor condition & prep: If your subfloor needs leveling, repair, or moisture mitigation, expect adders.

  • Removal of old floor: If you have to tear out old tile or flooring, that’s typically $2–$5 or more per sq ft extra.

  • Grout, sealer, trim & transitions: Those finishing touches (and cleanup) are often overlooked but do get added.

  • Labor rates & contractor markup: In busy seasons or with top contractors, labor can stretch your costs.

Sample Scenarios for Phoenix Tile Jobs

  • A modest 100 sq ft floor with mid-grade ceramic, straight pattern, sound subfloor → ~ $700 to $1,200

  • 200 sq ft with better porcelain or a pattern like a diagonal layout → ~ $2,000 to $4,000+

  • A premium job (stone, mosaics, full demo & prep) of 150 sq ft → $2,500 to $6,000+

These are ballpark ranges: your quote could differ depending on your exact specs, tile brand, room layout, waste, etc.

Tips from a Friendly Remodeler

  1. Get at least 3 detailed written quotes — insist they break out “material + labor + extras” so you compare apples to apples.

  2. Supply your own tile (if you want control) — sometimes that lets you save or choose more flexibly.

  3. Stick to simple patterns unless you love paying for extra labor.

  4. Check subfloor early — discover hidden problems before install begins.

  5. Order 10–15% extra tile for cuts, waste, breakage, color matching.

  6. Ask about warranties, cleanup, and maintenance — sealing, grout choosing, and cleanup often sneak in afterward if not included.

In Summary

For a typical Phoenix tile job in 2025, you’ll often see quotes in the $6.50 to $10+ per square foot range for ceramic, maybe more for upscale materials or complex layouts. If you’re doing a solid midrange job, budgeting around $8–12 per sq ft gives you breathing room for extras.

Want me to build you a Phoenix tile cost estimator widget (with sliders for tile type, room size, layout complexity) to add to mkremodeling.com? Happy to whip that up next.

GET A TILE INSTALLATION QUOTE IN MESA HERE!

[/vc_column_text]

Are you thinking about installing tile in Mesa, Arizona? MK Remodeling offers professional and affordable remodeling services including kitchen remodeling and bathroom remodeling in many areas of the Phoenix, Arizona area.

[/vc_column][/vc_row]

Hardwood Flooring Costs 2025
Written by webtechs

Hardwood Flooring Costs 2025

Hardwood Flooring Costs in Phoenix, AZ: What to Budget in 2025

If you’re thinking of upgrading your floors in Phoenix this year, hardwood is a timeless and value-adding option. But knowing how much to budget is key before getting those contractor bids. Below is a practical, local look at what hardwood flooring costs in 2025 in the Phoenix area — what drives costs, sample scenarios, and tips to keep things in check.

What Drives Hardwood Flooring Costs

Several factors combine to determine your final price per square foot. Here’s what moves the needle:

  1. Type of Hardwood & Grade
    Solid hardwood generally costs more than engineered, and exotic species (walnut, Brazilian cherry) cost more than domestic ones like oak or maple.
    – In Phoenix, material costs for hardwood are often quoted in the $7.00 to $9.00 per sq ft range just for the wood itself. Manta
    – Across national guides, hardwood materials alone typically range from $3 to $15 per square foot depending on species, grade, plank width, and finish. HomeGuide+2Go Flooring+2

  2. Labor & Installation Method
    Labor is a big portion of the cost. Some contractors in Phoenix charge an average installation labor rate of $8 per square foot (for simple installs over a sound subfloor) in Arizona. azwood.com
    ProMatcher’s Phoenix estimates for mid-grade solid hardwood (installed) sit around $7.68 per sq ft (with a broader range of $6.39 to $8.96) for the whole job (material + labor). Promatcher
    Nationally, guides put total installed hardwood (materials + labor) in the range of $6 to $25 per square foot, depending on complexity and material choices. Go Flooring+4Angi+4HomeGuide+4

  3. Subfloor Prep, Removal & Repairs
    If you have to remove old flooring, repair or level subfloors, or deal with moisture issues, that adds cost. Some quotes will include “demo & disposal,” others not.
    For example, material removal or replacement, joist work, or leveling can tack on extra dollars per square foot (often $1–$5 or more). elephantfloors.net+3This Old House+3HomeGuide+3

  4. Finish, Waste, Patterns & Extras

    • Prefinished vs site-finished wood affects cost.

    • Wide planks, custom inlays, special patterns (herringbone, etc.) raise labor.

    • Trim, transitions, baseboards, and edge moldings add linear-foot costs.

    • Ordering extra (5–10 % or more) to account for cuts or waste is smart.

  5. Local Market & Contractor Markup
    Phoenix’s labor rates, material sourcing, and competition play a role. In hotter markets or during busy seasons, prices tend to creep up.

Sample Cost Scenarios (Phoenix / Arizona Context)

Here are hypothetical, but plausible, cost ranges for typical hardwood flooring jobs in the Phoenix area:

Scenario Area Material / Quality Estimated Total Cost*
Basic domestic hardwood (e.g. red oak, narrower planks), simple layout 500 sq ft mid-grade solid or engineered $4,000 – $7,000
Midrange hardwood, wider planks, some trim work 800 sq ft better grade oak or white oak $8,000 – $14,000
Premium / exotic species, custom patterns, full demo & subfloor repair 600 sq ft walnut, wide plank, site finishing $10,000 – $20,000+

* These include material, labor, subfloor prep, transitions, and cleanup. Your actual quote may fall above or below depending on conditions.

As a point of reference, AZWood’s Phoenix service shows material cost estimates of $5–$10 per sq ft for hardwood and labor rates from $3–$7 (depending on complexity) in a Phoenix example. azwood.com And HomeYou’s Phoenix cost guide notes traditional wood options in the range of $3 to $14 per square foot (material + install) depending on species and quality. Homeyou

Cost-Saving Tips for Phoenix Property Owners

  • Choose the right wood / engineered option: For many homeowners, a good engineered hardwood offers the beauty of solid wood with more stability, often at a lower cost.

  • Keep layout simple: Avoid complicated patterns unless your budget allows. Straight runs cut down labor.

  • Bundle demo / removal tasks: If you’re already renovating, tie in hardwood installation with other trades to share costs.

  • Shop around & get breakdowns: Ask for material cost, labor cost, and “extras” (trim, cleanup) broken out. Compare at least 3 local bids.

  • Order extra wood: Getting 5–10 % extra accounts for cutting waste, especially in rooms with many corners or alcoves.

  • Verify what’s included: Some quotes omit baseboards, transitions, or disposal — make sure those are clearly included or budgeted.

  • Time your project: Off-peak seasons (fall, winter) may bring better contractor availability and pricing.

Final Thoughts for Phoenix Hardwood Projects in 2025

If you’re planning hardwood flooring in Phoenix in 2025, a smart budget range to aim for is $6 to $12 per square foot for many projects — material + labor — with the understanding that simpler jobs may come in lower and premium ones (exotic species, major subfloor work) may push well above that. Using local benchmarks like ProMatcher’s $7.68 installed average for mid-grade solid hardwood in Phoenix gives you a useful anchor. Promatcher

Because hardwood is a long-term investment, getting it done right matters. Want me to build you a Phoenix-specific hardwood cost estimator tool (sliders for species, layout complexity, subfloor condition) you could embed into mkremodeling.com? I can do that next if you like.

GET A HARDWOOD FLOORING INSTALLATION QUOTE IN MESA HERE!

[/vc_column_text]

Are you thinking about installing hardwood flooring in Mesa, Arizona? MK Remodeling offers professional and affordable flooring installationbathroom remodels, and kitchen remodeling services in many areas of the Phoenix, Arizona area.

[/vc_column][/vc_row]

Kitchen Backsplash Installation Costs 2025
Written by webtechs

Kitchen Backsplash Installation Costs 2025

GET A KITCHEN BACKSPLASH INSTALLATION QUOTE IN MESA TODAY!

Kitchen Backsplash Installation Costs in Phoenix, AZ — What to Expect in 2025

If you’re thinking of spiffing up your Phoenix kitchen this year, installing or replacing a backsplash is one of those upgrades that pays off in both function and style. But before you pull up a tile sample or start tearing out walls, let’s walk through what it really costs in the Valley of the Sun in 2025, and how to budget smart.

Why Costs Vary — The Key Factors

A backsplash isn’t just tile and grout. The total cost depends on several moving parts:

  • Material choice: Basic ceramic is much cheaper than glass, natural stone, or metal accent tiles.

  • Size & coverage: The more square footage (and more height), the more material and labor.

  • Pattern complexity & cuts: Herringbone, mosaics, intricate inlays, lots of small tile cuts or odd shapes (outlets, windows) all raise labor time.

  • Wall prep & demolition: If you need to remove old tile, repair drywall, flatten the wall, or patch plumbing or electrical, that adds to cost.

  • Local labor market & contractor markup: Cities or hot markets pay more in labor.

  • Extras: Grout sealing, edge trim, cleanup, waste disposal, and traveling time all get tacked on.

What Phoenix Homeowners Are Paying

Local tile & backsplash contractors in the Phoenix area suggest that small jobs, say 10 to 20 square feet, often land between $300 and $600 depending on tile quality and complexity. AZ Stone and Tile Concepts
For medium kitchens needing 20–40 square feet, costs can climb to $600 to $1,200 or more. AZ Stone and Tile Concepts

More generally, national and regional guides suggest these ranges:

  • According to HomeGuide, a typical installed backsplash costs $10 to $50 per square foot, with average jobs falling between $500 and $1,700 (materials + labor) HomeGuide

  • Angi’s 2025 data shows commonly $480 to $1,500, with $1,000 as a ballpark average, and per-square-foot rates from $15 to $40 Angi

  • HomeAdvisor likewise reports the same $480–$1,500 installed range, with many homeowners spending about $1,000 Home Advisor

  • HomeWyse projects a baseline of $28.16 to $49.35 per square foot in 2025 for tile backsplash installation, with the caveat that job conditions can raise or lower that range Homewyse

Because Phoenix tends to have solid demand, desert-area transport, and seasonal workload, you might see the higher end of these ranges more often — especially for boutique materials or tricky layouts.

Sample Cost Scenarios (Phoenix Edition)

These examples assume you’re working between lower and upper midrange conditions, in the Phoenix area context:

Scenario Approx Area Material / Style Estimated Cost
Basic ceramic subway tile, 20 sq ft, simple grid ~20 sq ft Mid-range ceramic $400 to $900
Glass mosaic accent band in a 30 sq ft backsplash ~30 sq ft Mixed ceramic + glass $900 to $1,800
Stone or marble tile, full height behind range wall, 35 sq ft ~35 sq ft Natural stone or marble $1,500 to $3,000+
Slab/continuous countertop-matching backsplash, custom edges 25–40 sq ft Stone slab, one slab piece $2,500 to $5,000+ (premium)

These are rough guides — your quote could land above or below depending on your tile choice, layout, and prep needs.

Cost-Saving Tips for Phoenix Projects

  1. Buy smarter materials
    Ceramic and standard porcelain tile remain your most reliable “bang-for-buck” picks. Save glass, stone, or metal for accent strips or focal zones.

  2. Keep patterns simple
    Straight, horizontal or vertical grid layouts reduce cuts and labor time. Avoid overly small mosaics everywhere, or use them just in small focal areas.

  3. Do wall prep ahead (if you can safely)
    If you’re comfortable patching drywall or smoothing walls, you might negotiate a lower labor rate because the contractor has less “unknowns.”

  4. Bundle tasks
    If you’re doing a kitchen refresh (painting, cabinet work, lighting), get quotes that bundle backsplash work so you don’t pay multiple trip charges.

  5. Order extra (waste margin)
    Ask for 10–15% extra tile for cuts, breakage, or mismatch. Running short mid-project is a costly delay.

  6. Get multiple local bids
    In Phoenix, contractor competition can swing estimates. Always get 2–3 written bids with exactly the same specs.

  7. Ask about warranty, sealing, cleanup
    Sometimes low estimates exclude sealing, caulking, or cleanup. Confirm those are included (or priced out) up front.

Final Thoughts for Phoenix Kitchen Owners

If you’re doing a typical backsplash in Phoenix in 2025 — say 20 to 35 square feet, with decent tile and average-level layout — budgeting $700 to $1,500 is wise, with room upward for premium design. You might get small jobs under $600, or high-end jobs over $3,000, but this middle ground is where most fall.

Are you thinking about installing a kitchen backsplash in Mesa, Arizona? MK Remodeling offers professional and affordable kitchen backsplash installation services in many areas of the Phoenix, Arizona area.

Do Gas Ranges Need To Be Vented?
Written by webtechs

Do Gas Ranges Need To Be Vented?

Do Gas Ranges Need To Be Vented?

Gas ranges do not always require venting, but it is strongly recommended for safety, indoor air quality, and optimal performance. Here’s why venting is important and when it might be necessary:


Why Venting is Important

  1. Remove Harmful Byproducts:
    • Gas ranges produce combustion byproducts, such as carbon monoxide (CO), nitrogen dioxide (NO₂), and water vapor. Proper venting reduces the accumulation of these gases indoors.
  2. Improve Indoor Air Quality:
    • Cooking releases grease, smoke, and odors that can linger. A vented range hood helps keep your kitchen air clean and fresh.
  3. Control Moisture and Heat:
    • Gas ranges release moisture and heat during use. Venting helps prevent excess humidity and reduces the strain on your HVAC system.

When Venting is Required

  • Local Building Codes:
    • Some local codes may mandate venting for gas ranges, especially in smaller or tightly sealed homes.
  • High-Capacity Burners:
    • If your range has high-output burners or is designed for commercial use, venting is often necessary to handle the heat and byproducts.

Types of Venting

  1. Ducted (External Venting):
    • Uses a duct to carry air outside. This is the most effective option for removing pollutants and moisture.
    • Ideal For: Heavy cooking, high-capacity ranges, or frequent frying.
  2. Ductless (Recirculating):
    • Filters air through charcoal filters and recirculates it back into the kitchen.
    • Ideal For: Homes without duct access, though less effective than ducted systems.

Best Practices for Gas Ranges

  • Install a Range Hood: Choose one that meets or exceeds the power of your gas range (measured in cubic feet per minute, or CFM).
  • Use Ventilation While Cooking: Always turn on the range hood or open windows when using your gas stove.
  • Maintain Equipment: Clean range hood filters and check that ducts are clear for optimal performance.

Exceptions

  • In very well-ventilated areas, or if the gas range is rarely used, venting may not be essential. However, even in these cases, occasional use of a vent or opening windows is advisable.

For safety and efficiency, proper venting of gas ranges is a best practice that protects your home and health.

Are Gas Ranges Safer Than Electric Ranges?

The safety of gas ranges compared to electric ranges depends on several factors, including installation, maintenance, and usage. Here’s an analysis of the safety aspects of both types of ranges:


Gas Ranges

Advantages:

  1. Immediate Heat Control:
    • Gas burners heat and cool quickly, reducing the risk of accidental burns from lingering heat.
  2. Works During Power Outages:
    • Gas ranges can be used during electrical outages (manual ignition may be required).

Potential Safety Risks:

  1. Gas Leaks:
    • A poorly maintained or improperly installed gas range can leak gas, posing explosion or fire risks.
  2. Carbon Monoxide (CO) Emissions:
    • Incomplete combustion can produce harmful CO. Proper ventilation and functioning detectors are critical.
  3. Open Flames:
    • The visible flame increases fire risks if flammable materials come too close.

Electric Ranges

Advantages:

  1. No Open Flames:
    • Safer for preventing fires from contact with combustible items.
  2. No Gas Leaks:
    • Removes the risk of gas-related hazards.
  3. Cool Surface Options:
    • Induction cooktops provide heat directly to cookware, keeping surfaces relatively cool.

Potential Safety Risks:

  1. Residual Heat:
    • Electric burners stay hot longer after being turned off, increasing the risk of burns.
  2. Electrical Hazards:
    • Faulty wiring or damaged elements can pose a shock or fire hazard.
  3. Slow Heat Adjustment:
    • Slower response time may lead to overheating food or cookware.

Which is Safer?

  • Gas Ranges Are Safer If:
    • Proper ventilation (e.g., a range hood) is in place to manage fumes.
    • The range is regularly inspected for leaks or wear.
    • CO and smoke detectors are installed and functioning.
  • Electric Ranges Are Safer If:
    • You are concerned about eliminating risks of gas leaks or CO poisoning.
    • Induction cooking is an option, as it minimizes direct heat exposure.

General Safety Tips for Both:

  1. Keep the Area Clear: Keep flammable materials (e.g., towels, papers) away from burners.
  2. Monitor Cooking: Never leave food unattended on a hot burner.
  3. Child Safety: Use burner covers or controls to prevent accidental use.
  4. Regular Maintenance: Periodic inspections and cleaning can prevent most safety issues.

Conclusion

Neither gas nor electric ranges are inherently “safer” than the other; the overall safety depends on proper use, maintenance, and precautions. Gas ranges introduce risks related to combustion, while electric ranges can cause burns from residual heat or shocks from faulty wiring. Choose the type that aligns with your household’s needs, and follow recommended safety practices.

GET A KITCHEN RANGE HOOD QUOTE IN MESA HERE!

Are you thinking about installing a kitchen range hood in Mesa, Arizona? MK Remodeling offers professional and affordable remodeling services including kitchen remodeling in many areas of the Phoenix, Arizona area.

Do Gas Ranges Need To Be Vented?
Written by webtechs

Do Electric Ranges Need To Be Vented?

Do Gas Ranges Need To Be Vented?

Yes, gas ranges should be vented to ensure the safe and proper operation of the appliance. Ventilation for gas ranges serves several important purposes:

Electric stove ranges do not require venting in the same way that gas stoves do, but venting is still recommended for a few key reasons:

  1. Odor and Smoke Control: Cooking can release smoke, steam, and odors, which a range hood can help to clear out. This can be especially helpful if you cook dishes that produce a lot of steam or frying oil, which can linger in the kitchen.
  2. Grease and Residue: When cooking with oils, fine grease particles can disperse in the air and settle on nearby surfaces, leading to buildup on cabinets and counters. A range hood helps trap these particles, keeping the kitchen cleaner.
  3. Improved Air Quality: Cooking produces particulate matter that can impact indoor air quality. Though it’s more of a concern with gas stoves, electric stoves still produce some particles and heat, which a vented range hood can help to mitigate.
  4. Condensation Control: A range hood can help reduce moisture buildup in your kitchen by venting steam outside, which can prevent potential issues like mold and mildew.

For kitchens without an exterior vent, a recirculating or ductless range hood is an option. These hoods use filters to capture grease and odors, then recirculate the filtered air back into the room, though they aren’t as effective as venting directly outside.

Are Electric Ranges Safer Than Gas Ranges?

Electric ranges are generally considered safer than gas ranges for a few reasons, though each type comes with its own safety considerations:

1. No Combustion or Carbon Monoxide

  • Gas Ranges: They burn natural gas or propane, which releases carbon monoxide (CO) as a byproduct. Poor ventilation or malfunctioning burners can lead to CO buildup, which is toxic and potentially fatal.
  • Electric Ranges: Since they don’t involve combustion, electric ranges don’t emit CO, eliminating this risk.

2. Reduced Fire Hazard

  • Gas Ranges: Gas leaks are a potential risk with gas ranges. If a gas burner is accidentally left on or not properly lit, it could release gas into the air, which is flammable and can pose a fire or explosion risk.
  • Electric Ranges: While electric ranges can still start fires if flammable items are left on a hot surface, they generally don’t carry the same explosion risk as gas.

3. Temperature Control

  • Gas Ranges: Many cooks prefer the precise heat control of gas, but flames can sometimes lead to accidental burns or scorches, especially if they extend beyond the edge of a pan.
  • Electric Ranges: With smooth, flat surfaces, electric ranges are less likely to ignite stray items near the stove, and they pose less risk of a flame-related burn.

4. Installation and Maintenance

  • Gas Ranges: They require professional installation and regular checks for gas leaks, as well as ensuring proper ventilation.
  • Electric Ranges: They’re typically easier to install and maintain, with no need to monitor gas lines or vents.

5. Child Safety

  • Electric Ranges: With induction stovetops, in particular, there’s an added level of safety, as the cooking surface only heats up where it makes contact with compatible cookware. This can help prevent burns.
  • Gas Ranges: Open flames may pose more risks, particularly if young children are present.

In short, while both types require proper usage and maintenance, electric ranges tend to offer a safer experience, especially for households that may be concerned about gas leaks or carbon monoxide exposure.

Best Ways To Vent

The best way to vent a stove is to have it vent to the outside. If there is no built-in ventilation in your home, install one about 30 inches above the top of the stove. It needs to match the width of the stove and at least a depth of the front burners. Range hoods are rated by the cubic feet of air they remove in sixty seconds. It is also very important to replace the filter once every three months. They cost from $40 upwards and can be purchased online or at appliance stores. Whatever model of vent you decide on, be sure you turn it on as soon as you start to cook when using gas ranges.

GET A KITCHEN RANGE HOOD QUOTE IN MESA HERE!

Are you thinking about installing a kitchen range hood in Mesa, Arizona? MK Remodeling offers professional and affordable remodeling services including kitchen remodeling in many areas of the Phoenix, Arizona area.

Tile Installation Costs 2025
Written by webtechs

Tile Installation Costs 2024

The cost of tile installation can vary based on several factors, including the type of tile, the size of the area, the complexity of the installation, and your geographic location. Here’s a detailed breakdown of what you might expect in terms of costs:

Factors Influencing Tile Installation Costs:

  1. Type of Tile:
    • Ceramic Tile: Generally more affordable.
    • Porcelain Tile: More durable and slightly more expensive than ceramic.
    • Natural Stone Tile: Includes materials like marble, granite, travertine, and slate, which can be significantly more expensive.
    • Glass Tile: Typically used for backsplashes and decorative elements, can be more expensive.
  2. Tile Size and Shape: Larger tiles can sometimes be more expensive to install due to the need for precision and potentially more waste. Intricate shapes or mosaics also increase labor costs.
  3. Installation Complexity: Complex patterns (e.g., herringbone, chevron) and additional features (e.g., inlays, borders) can increase labor costs.
  4. Preparation and Subfloor: Costs may increase if the subfloor needs significant preparation or repair.
  5. Geographic Location: Labor costs vary by region, with urban areas typically having higher rates than rural areas.
  6. Additional Materials: Grout, sealant, underlayment, and other materials add to the overall cost.

Cost Estimates:

Material Costs:

  • Ceramic Tile: $1 – $7 per square foot
  • Porcelain Tile: $3 – $10 per square foot
  • Natural Stone Tile: $5 – $30+ per square foot
  • Glass Tile: $7 – $30 per square foot

Installation Costs:

  • Labor: $4 – $15 per square foot, depending on complexity and region

Additional Costs:

  • Subfloor Preparation: $1 – $5 per square foot, depending on the condition of the existing floor
  • Grout and Sealant: $0.50 – $2 per square foot
  • Removal of Old Flooring: $1 – $3 per square foot

Example Total Costs:

Example 1: Ceramic Tile Installation

  • Material: $3 per square foot
  • Labor: $5 per square foot
  • Additional Costs (grout, sealant, etc.): $1.50 per square foot
  • Total: $9.50 per square foot
  • For a 200-square-foot area: $1,900

Example 2: Porcelain Tile Installation

  • Material: $7 per square foot
  • Labor: $8 per square foot
  • Additional Costs: $1.50 per square foot
  • Total: $16.50 per square foot
  • For a 200-square-foot area: $3,300

Example 3: Natural Stone Tile Installation

  • Material: $15 per square foot
  • Labor: $10 per square foot
  • Additional Costs: $2 per square foot
  • Total: $27 per square foot
  • For a 200-square-foot area: $5,400

Tips for Managing Costs:

  1. Get Multiple Quotes: Obtain quotes from several contractors to compare prices and services.
  2. Choose a Simple Pattern: Less complex patterns can reduce labor costs.
  3. DIY: If you have the skills, doing the installation yourself can save money. However, proper installation is crucial to avoid future issues.
  4. Buy in Bulk: Purchasing tiles in bulk or during sales can reduce material costs.
  5. Plan for Waste: Order extra tiles to account for cuts and waste, typically 10-15% more than the area to be covered.
  6. Consider Long-Term Value: Higher-quality materials might be more expensive initially but can offer better durability and lower maintenance costs over time.

By carefully considering these factors and planning your budget, you can achieve a beautiful tile installation that fits your financial constraints.

GET A TILE INSTALLATION QUOTE IN MESA HERE!

[/vc_column_text]

Are you thinking about installing tile in Mesa, Arizona? MK Remodeling offers professional and affordable remodeling services including kitchen remodeling and bathroom remodeling in many areas of the Phoenix, Arizona area.

[/vc_column][/vc_row]

Hardwood Flooring Costs 2025
Written by webtechs

Hardwood Flooring Costs 2024

The cost of hardwood flooring can vary widely based on several factors, including the type of wood, the quality, the installation method, and your location. Here’s a detailed breakdown of what you might expect in terms of costs:

Factors Influencing Hardwood Flooring Costs:

  1. Type of Wood: Different species of hardwood vary in price. Common types include oak, maple, cherry, and more exotic species like mahogany or Brazilian cherry.
  2. Grade of Wood: The quality or grade of the wood affects the price. Higher grades have fewer knots and imperfections and a more uniform appearance.
  3. Plank Size: Wider planks can be more expensive than narrower ones.
  4. Finish: Pre-finished wood flooring is generally more expensive than unfinished wood, but it saves on finishing costs during installation.
  5. Installation Method: The complexity of the installation (e.g., floating, nail-down, glue-down) and whether you hire a professional can impact the cost.
  6. Location: Costs can vary by region due to differences in labor rates and material availability.
  7. Subfloor Preparation: Additional costs may be incurred if the subfloor needs to be repaired or leveled.
  8. Additional Materials: Costs for underlayment, moldings, and transition strips can add to the overall expense.

Cost Estimates:

Material Costs:

  • Low-End Options: $3 – $5 per square foot (e.g., domestic hardwoods like red oak or maple).
  • Mid-Range Options: $5 – $10 per square foot (e.g., higher-grade oak, hickory, or cherry).
  • High-End Options: $10 – $20+ per square foot (e.g., exotic species like Brazilian cherry, mahogany, or teak).

Installation Costs:

  • Professional Installation: $3 – $8 per square foot, depending on the complexity and region.
  • DIY Installation: You can save on labor costs, but you’ll need to consider the cost of tools, materials, and your time.

Additional Costs:

  • Subfloor Preparation: $1 – $2 per square foot if significant work is required.
  • Underlayment: $0.50 – $1 per square foot.
  • Removal of Old Flooring: $1 – $2 per square foot.
  • Finishing (if using unfinished wood): $2 – $5 per square foot.

Example Total Costs:

Example 1: Low-End Installation

  • Material: $4 per square foot
  • Installation: $4 per square foot
  • Total: $8 per square foot
  • For a 500-square-foot room: $4,000

Example 2: Mid-Range Installation

  • Material: $7 per square foot
  • Installation: $5 per square foot
  • Total: $12 per square foot
  • For a 500-square-foot room: $6,000

Example 3: High-End Installation

  • Material: $15 per square foot
  • Installation: $7 per square foot
  • Total: $22 per square foot
  • For a 500-square-foot room: $11,000

Tips for Managing Costs:

  1. Get Multiple Quotes: Obtain quotes from several contractors to compare prices and services.
  2. Consider Engineered Wood: If cost is a concern, engineered hardwood can be a more affordable alternative to solid hardwood.
  3. DIY Installation: If you have the skills and tools, installing the flooring yourself can save money.
  4. Buy in Bulk: Purchasing materials in bulk or during sales can reduce the overall cost.
  5. Choose Pre-Finished Wood: This can save on installation time and finishing costs.

By carefully considering these factors and planning your budget, you can achieve the beautiful look of hardwood flooring while managing the costs effectively.

GET A HARDWOOD FLOORING INSTALLATION QUOTE IN MESA HERE!

[/vc_column_text]

Are you thinking about installing hardwood flooring in Mesa, Arizona? MK Remodeling offers professional and affordable flooring installationbathroom remodels, and kitchen remodeling services in many areas of the Phoenix, Arizona area.

[/vc_column][/vc_row]

Kitchen Backsplash Installation Costs 2025
Written by webtechs

Kitchen Backsplash Installation Costs 2024

GET A KITCHEN BACKSPLASH INSTALLATION QUOTE IN MESA TODAY!

The cost of installing a kitchen backsplash can vary based on several factors including the type of material, the complexity of the design, the size of the backsplash area, and labor costs in your area. Here’s a detailed breakdown of potential costs:

Cost Breakdown

  1. Materials:
    • Ceramic or Porcelain Tiles: $5 – $25 per square foot
    • Glass Tiles: $7 – $30 per square foot
    • Natural Stone Tiles (marble, granite, etc.): $10 – $50 per square foot
    • Metal Tiles (stainless steel, copper, etc.): $15 – $50 per square foot
    • Peel-and-Stick Tiles: $3 – $10 per square foot
    • Mosaic Tiles: $8 – $50 per square foot
  2. Labor:
    • Labor costs can vary greatly depending on your location and the complexity of the installation. On average, expect to pay between $40 and $100 per hour for professional installation.
    • Standard installation: $10 – $20 per square foot
    • Complex designs or patterns: $20 – $30 per square foot
  3. Additional Costs:
    • Grout and Sealant: $1 – $3 per square foot
    • Adhesive: $0.50 – $1.50 per square foot
    • Surface Preparation: $1 – $3 per square foot (if the wall needs extra prep work)
    • Removal of old backsplash: $2 – $5 per square foot

Total Cost Estimate

For a standard kitchen backsplash area of 30 square feet, the total cost can be estimated as follows:

  1. Ceramic or Porcelain Tile Backsplash:
    • Materials: $150 – $750
    • Labor: $300 – $600
    • Additional Costs: $60 – $225
    • Total: $510 – $1,575
  2. Glass Tile Backsplash:
    • Materials: $210 – $900
    • Labor: $300 – $600
    • Additional Costs: $60 – $225
    • Total: $570 – $1,725
  3. Natural Stone Tile Backsplash:
    • Materials: $300 – $1,500
    • Labor: $300 – $600
    • Additional Costs: $60 – $225
    • Total: $660 – $2,325
  4. Metal Tile Backsplash:
    • Materials: $450 – $1,500
    • Labor: $300 – $600
    • Additional Costs: $60 – $225
    • Total: $810 – $2,325
  5. Peel-and-Stick Tile Backsplash:
    • Materials: $90 – $300
    • Labor: $300 – $600 (less likely needed due to DIY nature)
    • Additional Costs: $60 – $225
    • Total: $450 – $1,125

Factors Affecting Cost

  • Complexity of Design: Intricate patterns, mosaics, or custom designs will increase labor costs.
  • Wall Condition: If the wall requires significant preparation or repair before installation, costs will be higher.
  • Geographic Location: Labor costs vary by region; urban areas tend to have higher rates than rural areas.
  • Professional vs. DIY: Opting for a DIY installation can save on labor costs but requires time, skill, and the right tools.

Conclusion

The cost of installing a kitchen backsplash varies widely based on material choice and complexity. For a typical kitchen backsplash, you can expect to spend anywhere from $450 to $2,325, including materials, labor, and additional costs. For a more accurate estimate, consider getting multiple quotes from local contractors.


Are you thinking about installing a kitchen backsplash in Mesa, Arizona? MK Remodeling offers professional and affordable kitchen backsplash installation services in many areas of the Phoenix, Arizona area.

Labor Cost to Remove Hardwood Flooring
Written by webtechs

Labor Cost to Remove Hardwood Flooring 2023

The labor cost to remove hardwood flooring can vary depending on several factors, read on to learn more!

Average Cost:

  • Per square foot: $1.50 to $4.00, with most jobs falling between $2.50 and $3.50 per square foot.

Factors affecting cost:

  • Flooring type: Engineered hardwood is generally easier to remove than solid hardwood, so it may cost slightly less.
  • Adhesive type: Floors glued directly to the subfloor take more time and effort to remove, potentially increasing the labor cost.
  • Floor condition: Heavily damaged or warped floors might require special handling, adding to the cost.
  • Square footage: Larger projects often qualify for discounted rates.
  • Disposal fees: Hauling away the removed flooring incurs additional charges.
  • Location and accessibility: Labor costs might be higher in remote areas or if the work involves difficult access.

Additional costs to consider:

  • Subfloor repair: If the removal process damages the subfloor, repairs will be necessary.
  • Furniture removal and protection: Moving furniture and protecting belongings during the process might involve extra charges.

GET A HARDWOOD FLOORING INSTALLATION QUOTE IN MESA HERE!

Are you thinking about installing hardwood flooring in Mesa, Arizona? MK Remodeling offers professional and affordable flooring installationbathroom remodels, and kitchen remodeling services in many areas of the Phoenix, Arizona area.

1 2 3 6